Showing posts with label tutorial. Show all posts

Friday, September 3, 2010

Kristen Stewart Classic Tutorial

Hello all,
Sorry I've been gone so long! School has started back up so I've been quite busy. On top of that, I have lost my camera charger and therefore have a non-working camera. Thus, the combination of the two factors has led to the lack of posts. Please forgive me as I'm back today with a more-than-awesome tutorial for you. As you all know, I love Kristen Stewart and in almost every picture of her, she's got this green-ish brown eye makeup. Here's two pictures of what I'm talking about:


As you can see, it's basically a green, teal on the lid topped with a brown red in the crease and some black liner all around the eyes. Easy right? No, not easy at all if you're trying to get the exact colors on her. Well I've tried and tried and tried and I think I finally found the perfect mix of colors and techniques to pull this look off and I'm here to share the steps with you! Click the "Read More" link for the full tutorial and pictures of myself with the makeup.

Sunday, August 15, 2010

Do it Yourself: Clampless Curling Iron


I don't know if you all have noticed the recent hair trend of mermaid-ish, wavy hair. Well, that style is created with what's referred to as a conical or clampless hair iron. They're basically your average hair curler, minus the clamp. Many say this the new, clampless iron is better because it doesn't cause ridges from the clamp, nor does it make your hair look crunchy. I've seen countless YouTube videos with gurus using this new type of hair curler and I have to admit, the curls look amazing. The only drawback? These clampless irons cost a fortune! The lowest price I could find is about $40. Higher end models reach the upper 100s and into the 200s, depending on brand.

I really would like to buy the clampless hair iron but, frankly, it just costs too much money. So then I got to thinking after looking at my normal hair iron with the clamp...can't I just take off the clamp part and thus, make a clampless iron? Well, I tried it and I'm here to tell you, you can make your own clampless iron without having to buy a new iron!

How does it work? It depends on your current curling iron. Most lower end irons have two side screws that hold the clamp in place. Simply obtain a screwdriver that will fit the screw and take them off. Voila, you can now have your own clampless iron. Yes, it really is THAT easy!

What if you don't have an iron with screws? Try to study the model and see if the springs that hold the clamp will slide out of place. If not, you can always buy a cheap curling iron with screws and unscrew it.

The best part about this DIY tutorial? If you're not satisfied with the way your hair looks after using the iron without the clamp, simply screw the clamp back on! So easy!

Here are some pictures to show you how my curling iron came apart.


Tuesday, January 19, 2010

Valentine's Day Makeup Ideas


These makeup ideas are perfect for Valentine's Day. All products can be found exclusively at Kohl's from the FLIRT! cosmetics line.


The most romantic Valentine’s Day is spent with your fiancĂ©! Match the mood of the occasion with the color of love on your lips – red! Keep the eye’s alluring with a swipe of dramatic liquid liner and seriously voluminous lashes.
Eye: To keep the focus on the lip, keep the eye relatively simple. Apply Dreamy Eyes Eyeshadow in Vanilla Truffle 08 from lashline to browbone. Finish with a swipe of Opening Line Liquid Liner in Ebony Edge 12.
Lip: Get perfectly glamorous red lips with High Wattage Intense & Creamy Lipcolor in Dazzle 27.
Cheek: Lightly define cheekbones with Peek-a-Blush Sheer Powder Cheek Color in Dragon Fly 13


Whether it’s been 2 years or 20, married gals should spice it up with their one and only with a fresh flush of berry on the lips and cheeks.
Eye: Sweep Dreamy Eyes Eyeshadow in Peach Champagne 05 from lashline to browbone. Apply Glamourazzi 20 from lashline to crease.
Lip: Use Squeeze Me Super Shiny Lipgloss in Bubbly Berry 18 for a sparkling berry tint.
Cheek: Using fingertips, apply I’m Whipped Cheek Mousse in Thrill Me 06 to the apples of cheeks for a pop of color


Relationships aren’t always easy or easily definable…Keep it seductive yet playful with a modern twist on the classic smoky eye. Go for a bold purple smoky look on the lids and Spring’s go-to understated nude lip.
Eye: Apply Dreamy Eyes Eyeshadow in Glamourazzi 20 from lashline to crease. To create depth, apply Goody Goody 22 to crease and smudge upwards and outward toward end of brow. For a more dramatic effect, continue applying to bottom lashline and smudge. Highlight browbone with Peach Champagne 05. Finish with a few coats of Far Out Lengthening Mascara in Extreme Black 01.
Lip: Use Squeeze Me Super Shiny Lipgloss in Heavenly Honey 03.
Cheek: Lightly dust apples of cheeks with Peek-A-Blush Sheer Powder Cheek Color in All Dolled Up 23


All the single ladies should have fun with their beauty look this year! Accessorize with an unexpected hot pink lip and a sexy gray, smoky eye.
Eye: Apply Dreamy Eyes Eyeshadow in Ink Spell 42 from lashline to browbone. To create depth, apply Wild Night 36 to crease. Smudge upwards and outward toward end of brow. Line the top and bottom lashline with Look of Love Eye Pencil in Ice Pixie 02. Finish with a few coats of Big Flirt Thickening Mascara in Black Wink 01.
Lip: Make your lips stand out from a mile away with Chickstick Smooth & Shiny Lipcolor in Sangria 19.
Cheek: Dust Apples of Cheeks with Peek-A-Blush Sheer Powder Cheek Color in Heart Candy 09


Cozy up with your significant other in a look that will warm up even the coldest of winter nights. Try a glistening, golden eye look and warm blush of bronze on the cheeks.
Eye: Apply Dreamy Eyes Eyeshadow in Solid Gold 37 from lashline to browbone and below lower lashes. To create depth, apply Cocoa Luster to crease. Finish the look with Lash-a-delic Fast Defining Mascara in Mod Black 01.
Lip: Pair the golden eye look with the perfect neutral lip – Plushious Liquid Velvet Lipcolor in Nude Envy 03.
Cheek: Dust cheek bones with Bring on the Bronze Bronzing Powder in Golden Minx 02


FTC regulation information:
*I did not purchase any of the products mentioned.
*I have not reviewed or used the products first-hand.
*I have no affiliations with this company.
*I am not being paid or earning any commission.

**According to FTC guidelines, products that are given or donated for review by a company or brand must be stated as such. Products that were purchased by the beauty blogger/reviewer will be stated as such.

Friday, November 20, 2009

Kristen Stewart Makeup

New Moon just came out today and I ABSOLUTELY love the movie. As a tribute to New Moon and the Twilight Saga fans out there, here is a link for recreating Kristen Stewart's New Moon Premiere look. Again, this is the premiere look; it isn't the the look in the movie.


LINK HERE (click)

Tuesday, October 27, 2009

Tarte Halloween Makeup Looks

Still don't know what you want to be for Halloween? Want some ideas? Well, a few posts ago I featured some Halloween looks that were created by Sephora. Today, I bring you some more looks but this time it's by the makeup brand Tarte. These links will give you some ideas on how to create your own Halloween look. Unfortunately, I don't believe they give you step-by-step breakdowns of the looks, only a list of information of what they used to create the look. Nonetheless, these looks aren't too complicated so just be creative and render to the best of your abilities. Click the links below for more info!

Devil Link

Cat Link

Mermaid Link

Vampire Link

Zombie Bride Link

Cleopatra Link

1920s Flapper Link

Monday, October 19, 2009

Sephora Halloween Tutorial Links

Here are some links to Sephora's 2009 Halloween looks. You can copy the looks exactly using the products mentioned or dupes with similar colors. However, I suggest that these be used as ideas and then expanded, depending on your taste. Anyway I hope you find these links helpful!

Cleopatra Link

Fairy Link

Vampire Link

Mouse Link

Marie Antoinette

Friday, October 16, 2009

Halloween Looks for LESS

Don't have a lot of money to splurge on Halloween costumes and makeup this year? Well..I don't exactly have a solution for the costume part...but I do have several makeup solutions for pulling off some cool looks  on a budget. To recreate these looks, purchase FLIRT cosmetics at any Kohl's store. To view a larger version of the image, click on it.


For more info on the products and looks, click here.

Thursday, October 8, 2009

Raggedy Doll


Halloween lovers, unite! I just filmed a video on how to EASILY recreate a raggedy doll look. I think you'll love it, or at least I hope so! If you do, please subscribe to my YouTube channel, follow me on this blog, and rate my video 5 stars. I hope to do more Halloween looks in the near future.

Saturday, September 26, 2009

Recreating Hollywood's Classic Day-Time Eyes


Have you ever found yourself wondering just HOW do those Hollywood stars get those glamorous eyes, like in the picture, that look so simple but yet so beautiful? Well, actually...it's quite easy to replicate and in less than 5 minutes, you too can be day-time gorgeous.

Saturday, July 25, 2009

Lookin Foxy like Megan


I don't usually post video make-up tutorials because of my schedule, but that doesn't mean that you, my viewers, should suffer. I read a lot of beauty blogs, some are great and some are not. What I usually do to learn new makeup tricks, application techniques, etc. is to watch other makeup gurus. So...if you've been loving Megan Fox, I sure do, and kind of want to know how she looks so darn foxy, then go to Kandee's page. The link is below. She does a step by step video on how to recreate one of Megan's looks and what products to use. Hope you enjoy her video!

Tuesday, June 23, 2009

DIY Winter to Summer Lipstick

Typically for summer, the look is always light and refreshing. So what happens when you've got a ton of darker, winter lipsticks that you love but can't wear because of the season? EASY, you layer them with other lipsticks to create a lighter look! So if you're the type of person who owns the reds, browns, and plums, don't fret ladies! I have got the perfect DIY tutorial to turn your winter lipsticks into a wearable summer lip color! Below are the steps Idid to create my summer perfect lip color with darker lipsticks. You don't have to get the exact same colors because this tutorial is meant to show you the steps and techniques of layering lip colors. It's not meant to be something you want to copy exactly because I want you to use your own dark, winter lipsticks and turn them into something wearable for yourself without going out to spend more money on products!

Step 1: Pick the darkest color, usually plums and browns or even dark red, and apply to lips. In my case, I chose Benefit's Ms Behavin lipcolor. It's the left swatch in the picture.

Step 2: Apply a red or pink tone on top of the first color. In my case, I chose Lancome's Red and Sensual Lava lipstick. It's the middle swatch in the picture.

Step 3: Apply a light pink, cream, or orange color as the final layer. In my case, I chose Estee Lauder's Pinkberry. It's the right most swatch in the picture.

So what do these three lipsticks come together to look like? See the picture below! Good luck with your attempt; remember it may take a few trys before the perfect trio of lip colors will come together to create a summer lip color for you!


Tuesday, June 16, 2009

Natural Summer Look

It's summer and no one should be walking around with a ton of makeup! It's just NOT pretty ladies. Guys like a natural woman sometimes. But let me be the first to say that when I say natural, I don't mean nothing on your face! Being a woman myself, I know many of us don't dare go outside without a hint of color here and there. So today I'm showing you my favorite summer look that I've been wearing a lot. It's so easy to pull off and the number of products is significantly low so you can achieve the look without breaking your bank!

Here's a picture I took of the overall look and a close up of the lips.

Products I used:
-Anastasia's Lash Lifting Mascara ($22.00 USD at Sephora and on the Anastasia website)
-MAC eyeshadow in Girlie ($14.50 USD at any MAC store)
-Almay Eyeliner in Brown Topaz ($6.99 USD at any drugstore)
-Benefit Lipstick in "Good to Go" ($18.00 USD at any Benefit counter)
-Bare Minerals Hydrating Mineral Veil ($29.00 USD and exclusively at Sephora stores only)
How to get the look:
1. Brush the hydrating mineral veil all over the face for a subtle, summer glow
2. Use your finger to apply the MAC eyeshadow all over your lids
3. Line your eyes using the Almay liner (top only, do not line the bottom lash line)
4. Apply the Anastasia mascara (try to limit it to 2 swipes max for a natural effect)
5. Apply the Benefit lipstick with your finger
*Try not to use foundation if possible because the look of foundation tends to counter the natural effect, unless applied expertly. Try to use concealer where you need it instead and then just dust on the mineral veil. The mineral veil will hide small imperfections and pink/red discolorations.
Hope you enjoyed this quick and easy tutorial!

Wednesday, May 27, 2009

Mermaid Eyes Eyeshadow

Hey guys, 
Here's the latest video from me! Hope you guys like it. It's my first eyeshadow tutorial. Sorry for the bloopers and stuff, I didn't edit because it would have made the video choppy and awkward.

Friday, May 1, 2009

Eyebrow Tutorial


Another makeup tutorial video! This is for those who want to know the basics of eyebrow grooming. 

Saturday, April 11, 2009

Face Sculpting


Here is my latest video tutorial. I used Napoleon Perdis's concealer palette that I found at Target in the video. Hope you enjoy it! Subscribe to my youtube channel and leave comments on this page in the chatterbox or comments tag please.


Monday, March 30, 2009

Purple Rocker Eyes


Some updates about the blog before I begin this tutorial:
I have decided to keep this blog and continue using it as my primary blog. The website stuff was getting to be too much. Yesterday, when I decided that I was going to continue using this blog, I decided that I wanted to make it more professional looking so I'm currently trying to revamp the site. I hope you guys like the new layout. It should be easier to access all the blogs by category now since you have links to view them by subject and not by date. 

Okay, so on with this tutorial! So this look is for you ladies out there that want a little extra pop in your makeup. This look compliments brown eyes really well, so don't be afraid to try it if you have darker eyes. By the way, the images shown are thumbnails. Please click on the image itself for the full-sized version. :o) 

This is what your eyes will look like at the end.
Photobucket

You will need the following:

-medium sized eyeshadow brush (Target has some for really cheap)

-blender brush (You can use a big, fluffy eyeshadow brush if you don't have one)

-Almay intense eyeshadow trio in "Play Up the Brown"

-eyeshadow primer (optional, but using it will make your eyeshadow stay on longer and less likely to crease)

-Almay intense eyecolor eyeliner in "Purple Amethyst"
Photobucket

Step 1: Start with a fresh eye. Don't have any eye-makeup on if possible because it'll make it harder to apply the makeup.
Photobucket

Step 2: Using the Almay eyeliner, line your upper waterline. You can make it easier by tilting your head slightly back and using one finger to lift up your eyelid. Be careful not to poke your eye!
Photobucket
Photobucket

Step 3: Slightly wet the brush with your eye primer if you have some. Then, using a regular eyeshadow brush, apply the purple eyeshadow the one on the bottom in the trio, over your eyelid. You should try to apply it so that a little bit of the eyeshadow goes above your crease.
Photobucket
Photobucket
Photobucket

Step 4: Using the same brush, apply the cream eyeshadow, the first one in the trio, onto the inner 1/3 of your eye. When I say inner, I'm referring to the area closer to your nose. Also apply a little bit of the eyeshadow under your eyebrows but very lightly.
Photobucket
Photobucket
Photobucket

Step 5: Using the same brush, again, apply the brown shade, the middle one in the trio, onto your crease. Make sure the brush bristles are horizontal, not vertical because your goal is to apply to the crease line and nowhere else.
Photobucket

Step 6: After you have applied eyeshadow to your crease, use your brush and pick up some of the purple shadow. Apply it to the middle of your eyelid and lightly sweep back and forth. This will add more of the purple since the cream and brown eyeshadows probably muddied up the colors a little.
Photobucket
Photobucket

Step 7: Using your blending brush, or a large eyeshadow brush, sweep back and forth a little above the crease. Make sure to not touch or disturb the areas with the concentrated eyeshadows. You are only doing this step to eliminate a color band that usually results when eyeshadow is applied and not blended out to make it become more of a gradient. Refer to the information as an example to where to place your brush.
Photobucket

Step 8: Using the eyeliner, line your eyelid fully on top. You can line the bottom too if you want more of a punk look.
Photobucket

If you've done everything correctly, you should end up with something like this:
Photobucket
Photobucket

Monday, February 2, 2009

Dry Eyelids/Eyebrows Tutorial

So I have been looking at a few blogs but have yet to read anything that addresses dry eyelids. Yes, I know it sounds funny but people do indeed have dry eyelids/eye area issues. To combat this issue, especially because it's winter and the cold weather makes people more prone to have dry skin, I decided to post this tutorial/beauty tip. This tutorial is highly suggested to those who use acne treatment systems (like Proactiv) and anything that would cause dryness around the eyes like facial toners, exfoliators, acne peels, etc. Before I begin the tutorial, please let me cite the makeup guru who provided me with the information about glycerin+water: Christine from www.temptalia.com. Her site is wonderful for product reviews and makeup tutorials. Check them out if you have the time.

You will need the following:
-100% liquid glycerin (sold in the first aid aisle of drug stores, walmart, and target)
*note* Liquid glycerin is not available at all these locations. In fact, it may be hard to obtain so I suggest you look at a few stores and if they don't have, it buy it online.
-any size eyeshadow brush
-empty travel size bottle, preferably one with a top that has a small hole (not spray bottles)
-permanent marker
-tap water or better yet, drinking water (small amount, about the size of half a normal cup)

Notes on the required materials: 
Liquid glycerin is cheap so you'll only need about one bottle to last you awhile. It is hard to find in a lot of stores so don't get frustrated if you can't find it-just go online to the same places and order it. Don't buy an expensive eyeshadow brush for the sole purpose of this tutorial, it's really not necessary. 


Instructions (best done at night):
You will first mark your empty bottle into four even sections with the permanent marker. You can eyeball it, but make sure the sections are somewhat evenly distributed. Take the bottle of liquid glycerin and pour some of it into your empty bottle until it fills 1/4 of the bottle. Fill the remainder of your plastic bottle with tap water or drinking water. Close the bottle and shake it for a minute. Afterwards, on a clean and makeup-free eye, drip one or two drops of the concoction onto your eyeshadow brush and swipe on your eyelids. Make sure you have your eyes close when you're doing this to avoid contact with your eyeball. Just pretty much don't stick it in your eye and you're good. Glycerin won't harm you so don't worry if you think you're gonna go blind and such. Glycerin is found in the majority of soap and lotions so it's a normal product. Just for those who are curious, liquid glycerin is used to treat dry skin (kind of like vaseline) Repeat this every night and you should have softer, more supple eyelids that aren't dry! BTW, you can also use this around your eyebrows too if you're acne care stuff is causing dryness in those areas too. I'm not too sure about slapping it on your face so don't try that to avoid potential clogged pores and such.

Hope you enjoy this tutorial. Forward to your friends if you like.

Love,
PK

Friday, January 30, 2009

Captivating Green Tutorial

So here's my first makeup tutorial! Yay! Before I get to the step-by-step instructions and pictures, I want to apologize for the blurry images. It's quite difficult to take pictures while you're applying makeup and I had my camera on the wrong setting. I'll try to either make the pictures clearer next time or just do a video tutorial. I welcome you all to try this look out and leave any feedback here or in the chatbox to the left. All I ask of you is to NOT steal my images (don't copy, don't save, don't post as your own, etc.) as I have worked really hard to make this tutorial and it's not nice to steal.

Captivating Green Tutorial: This look is more for a night out on the town, dinner, or a party. It's a bit too bold to be worn during the day but great for nighttime stuff. It's based primarily on green but has a splash of dark purple so your eyes look smokey as well as bright. I'm a big fan of Almay eyeshadow trios so most of my reviews will feature them. They're cheap ($6-7) dollars and last a long time.

This is what the final product will look like.


This is what you'll need: Almay intense eyeshadow trio in "Bring Out the Green," Almay intense eyecolor eyeliner in "Brown Topaz," eye primer, a small sheet of paper towel, one medium sized eye shadow brush (I bought a random one from a Target brand that cost around $3 each), a smudger brush-not shown in picture (optional, mine is the Kat Von D one), a big eye shadow blender brush; again, from the Kat Von D Eyebrush set (see older posts for review on it).


Step 1: Drip about two or three drops of your eyeprimer on the paper towel and swish your medium sized brush in that area.

Step 2: Using the middle color on the eyeshadow trio (dark green), apply on your eye going a little past the crease. Don't worry if it's messy, you'll clean that up in a second.

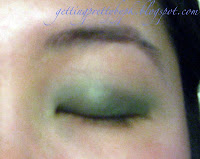
This is what your eyeshadow should look like when your eye is closed.


Step 3: Using your blender brush, sweep back and forth 2-3 times near the crease on each eye. Do NOT sweep over your entire eye, just toward the top where the shadow line is harsh. It's easiest if you hold the brush to where the bristles are vertical and tilt your head back so you can kind of see your eye socket. This should lessen the harsh line of the eyeshadow. 

 This is what it looks like after step 3, see the difference between this picture and that in step 2? The line is blended better and not abrupt.


Step 4: Using the medium brush, taking the lighter green/teal shade (the top one) and apply to the inner corner of your eye and extend back approximately 1/3 of your eyelid. This will create a brighter eye appearance and highlight your eyes.


Step 5: Taking your blender brush, lightly sweep back and forth where the teal shadow ends and the green shadow shows through. This will make your teal eyeshadow fade into the darker green as opposed to making it seem like two colors side by side and not blended.

Here is what it should look like now.


Step 6: Using the same brush, pat some of the purple (last shade) onto the bristle tips and swipe on the last 2/3 of your crease. Extend the color up slightly past your crease so that when you have your eyes open, the color can be seen a little. 

This is what it should look like when your eyes are closed.


Step 7: Taking the brown eyeliner, line your upper lash line by tilting your head back and pulling your eyelid slightly up (you can do this by lifting your eyebrows so that you don't touch your eyelid and mess up the eyeshadows). If you want, you can line the lower lash line too because this brown isn't really dark and won't be overpowering. I usually line my upper lash line and the outer half of my lower lash line. I've found that if you don't line your eyes with some type of eyeliner, your eyes tend to look smaller and the eyeshadows less flattering. However, if you have really long and thick eyelashes that are dark, eyeliner is optional.

Step 8: This step is optional. You can leave your lower eyeliner as is or you can take your smudger brush and lightly sweep back and forth on your lower lash line to make the eyeliner look smokey and less harsh.  


Step 9: Finally, apply mascara and you're done! This is what the final picture looks like.

Hope you enjoy the tutorial and have a wonderful weekend!